For this edition of #FixitFriday photo editing I’m going to work on some of my favorite photos from last summer and in the process relive my Block Island dream trip.
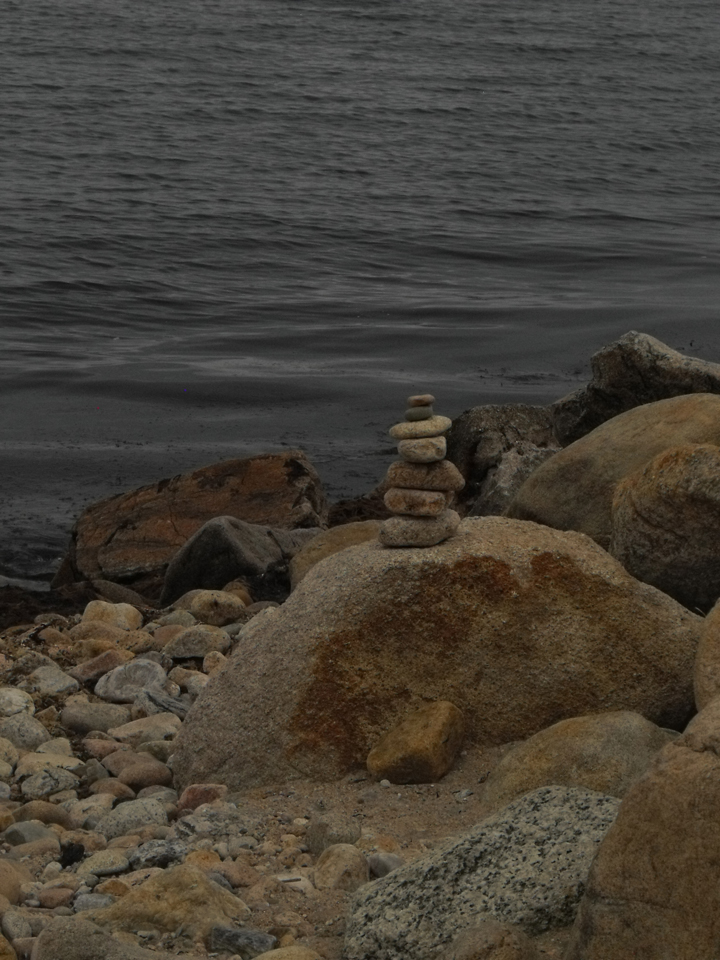
My camera that year was a glorified point and shoot Fuji 1500S and I had not learned how to read histograms in camera. I only had the option of JPS and can only dream of the possibilities if I had the RAW option. Most of the time the skies were overcast and cloudy, good when avoiding a sun burn, but I found it to be a photography challenge. The camera meter was reading the glare coming from the water and surrounding ocean. The result were photos that leaned toward the dark side, the cloudy skies were flat and drab. Although I reworked them a bit in Photoshop CS2 I still didn’t get good results.

My goal with photo editing is realism. I’m not trying to create photo art, or make a photo look fake or something it wasn’t. The human eye can interpret a scene a the beach with so much more clarity and detail than a camera. Sometimes it takes some post production here and there with photography to return the photograph into an accurate depiction of reality.

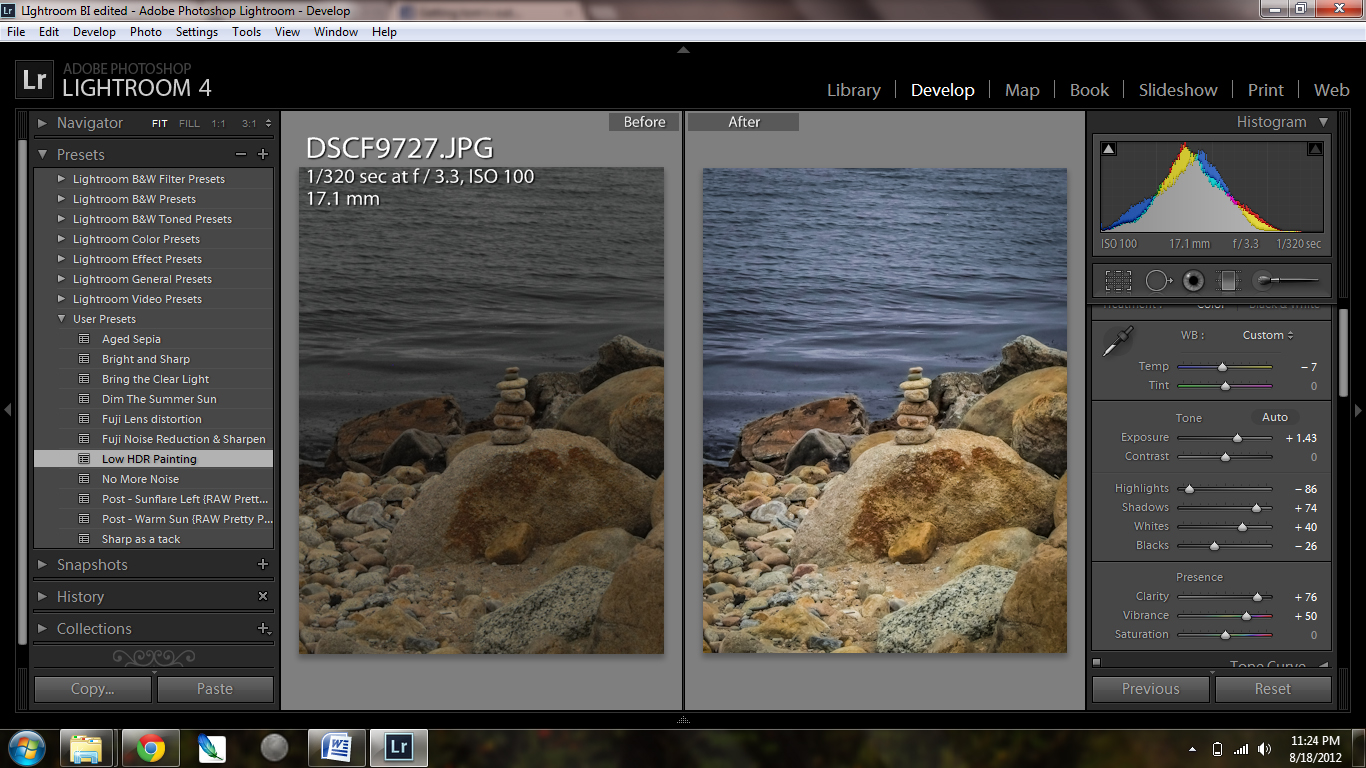
I always shot on aperture priority and as a result many of my images were underexposed. These dark images took more editing than just increasing the exposure, I opened up the shadows, and eliminated the camera noise in the Lightroom detail option by moving the noise slider to the right.
On the left side of the Adobe Lightroom screen shot there are User Presets. Presets are saved adjustments you can use again for an image of the same type. For example overexposed images in bright sun is called “Dim the Summer Sun” or “Bright and Sharp” for an underexposed image. Once a preset is saved it can adjusted and resaved under the same name. Presets save time when you have a batch of images under the same lighting that require the same adjustment.
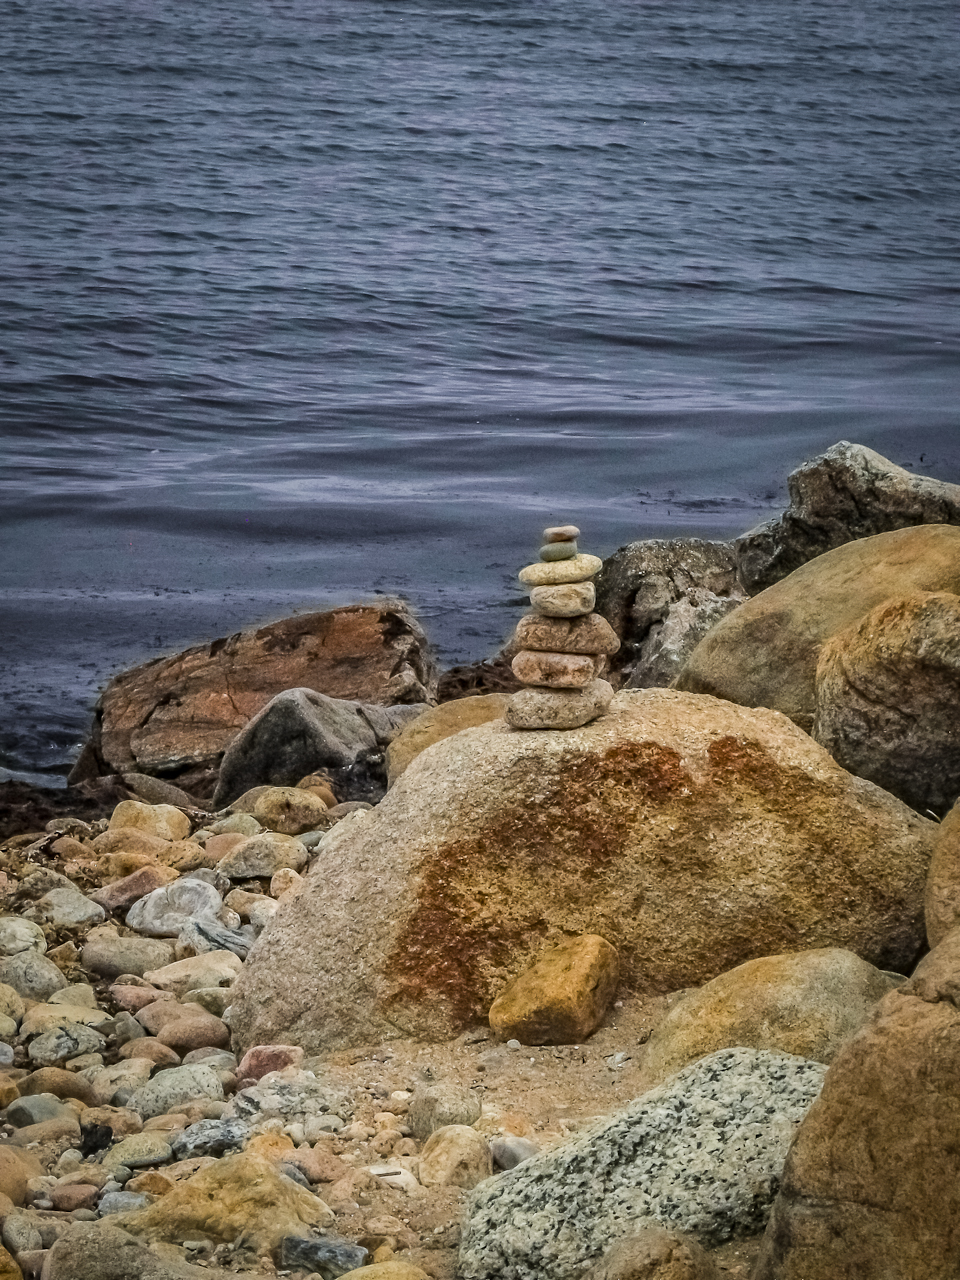
Below is the straight out of camera shot and the resulting end photo in Lightroom.

Edited version, what do you think?

What is the Best Program For Editing Photos?
If you were to ask me what my favorite photo editing program is I would have to say Lightroom. There are many features I love about the program but my favorite is Lightrooms high dynamic range in opening up shadows and not blowing out my highlights. I also love the ability to edit a batch of photos in seconds with the settings from my previous photo.
But I still use Photoshop for my graphic designs involving text and layers. Adobe has a wonderful subscription program where for only $10 per month you can use both Photoshop and Lightroom creative Cloud all you want with no obligation.
Adobe Photoshop Lightroom 5 Adobe Creative Cloud Photography plan (Photoshop CC + Lightroom) [Digital Membership]
 Adobe Photoshop Elements 13
 The Photoshop Workbook: Professional Retouching and Compositing Tips, Tricks, and Techniques
 Photoshop Elements 13 For Dummies (For Dummies Series)
Related Photo Editing Articles
- Take Better Photographs in 30 Days (http://www.squidoo.com/take-better-photographs-in-30-days)
- Photo Friday: Lilly Pads in Lightroom (ndjmom.wordpress.com)
- Adobe Lightroom after the shoot! (photokitfrost.wordpress.com)
- Using Lightroom 4: Black and White Conversion (ndjmom.wordpress.com)


